DIY Sensory Room Wall Ideas for Home and Classroom
Yes, you can make a sensory room wall at home or in class with easy, everyday things. A sensory room wall gives kids a place to touch, see, and hear many textures and sounds. Many schools now put sensory zones in classrooms. This lets more students and teachers use them. Kids with autism get help from sensory walls. They help kids focus and relax. You can try a diy way that works for your needs and space.
Key Takeaways
Make a sensory wall with things like faux fur, bubble wrap, and fabric. These materials are cheap and easy to change.
Plan your sensory wall so it has different areas. Some areas are for relaxing, some are for touching, and some are for listening. This helps everyone with different sensory needs.
Check all materials to make sure there are no sharp edges. Use glue that is safe and not toxic. A safe space lets kids explore and play more.
Let kids help with the design by asking what they like. This makes the sensory wall more fun and fits their needs better.
Add new items and themes to the sensory wall often. This keeps it interesting and helps kids keep learning and exploring.
Sensory Room Wall Basics
What Is a Sensory Room Wall?
You may ask why a sensory room wall is different. It is part of a sensory space. It lets you touch, see, and hear many things. You can make one at home or school. These walls use easy materials. They help make the room calm. You can add textures, lights, and sounds. These help you relax or pay attention. Here are some features you can use:
Feature | Description |
|---|---|
Flexible and Controllable Lighting | You can use dimmable lights or calming projections to set the mood. |
Soundproofing and Auditory Control | Acoustic panels and sound machines help manage noise and create calming sounds. |
A Variety of Textures and Tactile Experiences | Try adding soft, rough, or bumpy items for sensory touch. |
Comfortable and Purposeful Seating | Choose seats that let you rock or glide for extra comfort. |
Benefits for Kids and Classrooms
A sensory room wall gives your space many good things. Kids can focus better and feel less worried. Teachers see fewer meltdowns and more calm behavior. Parents and therapists say kids join in more and handle sensory input easily. Here are ways sensory walls help:
Better focus and concentration
Less anxiety and fewer meltdowns
Improved sensory processing
Calming for everyone
A sensory room wall makes a calm spot. You can handle feelings and sensory needs there. You get a diy idea that works for your home or classroom.
Who Can Use Sensory Walls
You do not need to be a certain age to use a sensory room wall. Many kids find them helpful, especially those with sensory processing disorders. Kids with autism like these walls. You can use sensory walls to explore and calm down. Anyone who needs a break or wants to relax can use a sensory room wall.
DIY Sensory Wall Guide
Materials and Tools List
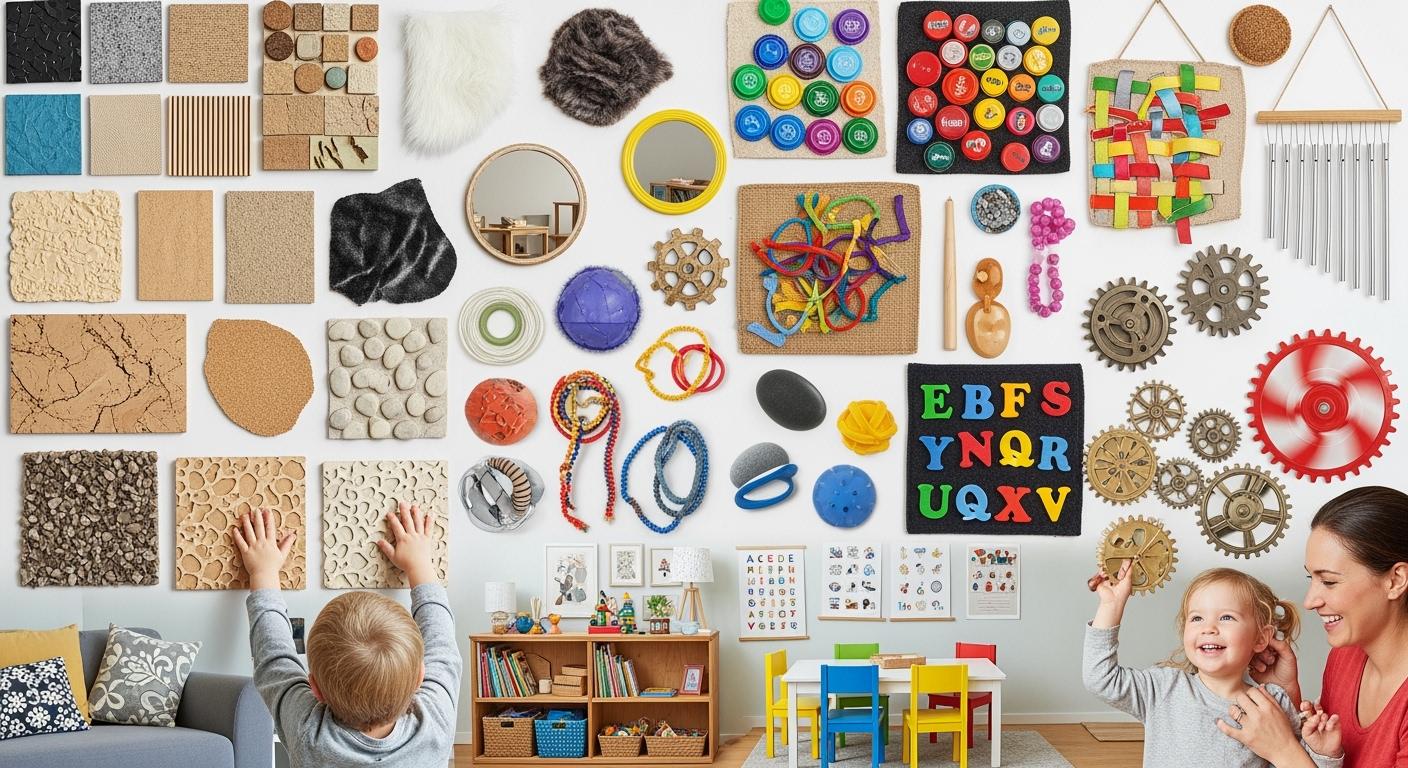
You can start your diy sensory wall with things you already have at home or in your classroom. You do not need fancy supplies. Many everyday items work well for creating different textures and sensory experiences. Here are some affordable materials you can use:
faux fur
rocks
beans
straws
crayons
toothpicks
happy face sponges
foam shapes
tissue paper
lycra bands
mesh
screen
makeup sponges
tin foil
cotton
corks
wire
pretend flowers
straw beach mat
costume jewelry like Mardi Gras beads
balloons
bubble wrap
Lego plates
wood
gel bags
wallpaper samples
bamboo
burlap
bark
twigs
felt
shammy
gauze
doily
old curtains or tablecloth
corrugated cardboard
silicone scrubbers
buttons
metal scrubbers
velcro
fake grass
lace ribbon
You can mix these materials to create a tactile sensory wall with different textures. For tools, you need scissors, glue, tape, and maybe a stapler. If you want to hang panels, you can use command strips with Velcro. These let you change things easily and keep your wall safe for children.
Tip: Always check that materials are clean and safe. Avoid sharp edges or small parts that could be a choking hazard.
Planning Your Wall Layout
You want your diy sensory wall to fit your space and meet your needs. Start by picking a spot that is easy to reach but not too busy. In a classroom, avoid hallways or places with lots of traffic. At home, choose a wall near a calming space or play area.
Think about how to make your sensory wall engaging. You can use soft, adjustable lighting to set a calming mood. Try plush fabrics or weighted blankets for comfort. Keep the area tidy so children feel relaxed. You can create zones for different sensory activities:
Relaxation zone: Add cozy seating like bean bag chairs or rockers.
Tactile zone: Use pillows, fidget tools, or clay for touch.
Calming equipment zone: Place bubble tubes, weighted lap pads, or headphones.
Visual zone: Hang colorful panels or light-up items.
Auditory zone: Include gentle music or nature sounds.
You can use a table to help plan your layout for children with different sensory needs:
Strategy | Description |
|---|---|
Mix textures and elements for all preferences. | |
Sound Control | Use sound-absorbing materials for a quieter sensory space. |
Quiet Spaces | Set up areas with soft lighting and minimal noise for calming. |
Flexible Choices | Let children pick what they want to explore. |
Adjustable Lighting | Use lights that you can dim or brighten as needed. |
Note: You can change your layout as you learn what works best for your diy sensory rooms.
Step-by-Step Assembly
You can build your diy sensory wall in simple steps. Here is how to make a sensory wall for your home or classroom:
Choose your wall or panel. Cardboard, wood, or foam boards work well.
Gather your materials. Pick items with different textures, colors, and sounds.
Cut and glue materials onto your panel. For example, glue bubble wrap, velvet, sandpaper, or cotton in sections.
Add buttons, zippers, or Velcro for tactile play. Sew or glue them onto sturdy fabric and attach to your wall.
Install lights or flashlights for visual sensory activities. Secure them with tape or Velcro.
Attach musical items like bells or rattles for sound exploration.
Use command strips with Velcro to mount panels. This keeps your wall safe and lets you update it easily.
Create nature panels with leaves, twigs, or stones. Glue them to cardboard or wood.
Add sensory bottles filled with colored liquids or small objects. Fix them to your wall for shaking and play.
Make sure everything is secure. Check for loose parts and smooth edges.
You can use this table for ideas on how to assemble different panels:
Panel Type | Materials | Instructions |
|---|---|---|
Cardboard, velvet, sandpaper, cotton, bubble wrap | Glue materials in sections for tactile exploration. | |
Button and zipper panel | Buttons, zippers, fabric | Sew or glue onto fabric, attach to wall for fastening practice. |
Light and shadow panel | LED lights, cardboard or wood | Install lights for on/off interaction. |
Musical panel | Bells, rattles, cardboard | Attach instruments for sound play. |
Fabric and textile panel | Silk, wool, cotton, felt | Sew and glue fabric scraps for touch. |
Rope and ribbon panel | Ropes, ribbons, cardboard | Attach for braiding and knotting activities. |
Sensory bottle panel | Bottles, colored liquids, wood | Fill bottles, fix to wall for shaking. |
Nature panel | Leaves, twigs, stones, cardboard or wood | Glue natural items for tactile sensory wall. |
Velcro fabric panel | Fabrics, Velcro, cardboard | Stick fabrics with Velcro for tearing and sticking activities. |
Pipes and funnels panel | Plastic tubes, funnels, wood | Attach for ball or marble passage activities. |
If you want to know how to make a sensory wall that fits your diy sensory rooms, try mixing panels and materials. You can always add new items or change the layout as children grow or their needs change.
You can create a sensory room wall that helps children relax, focus, and enjoy sensory activities. Your diy sensory wall can turn any home or classroom into a calming space for play and learning.
Sensory Wall Ideas and Variations

Tactile Sensory Wall Ideas
You can make any wall a sensory space with simple ideas. Textured wall panels are liked by occupational therapists. These panels let you feel different textures and help your senses. You can use faux fur, bubble wrap, sandpaper, and foam shapes. Try mixing soft, rough, and bumpy items for more fun.
Here are some tactile elements you can add:
Textured wall panels for touching and exploring
Buttons, zippers, and Velcro for playing
Soft fabrics like fleece or velvet for calmness
Bumpy surfaces like corks or rocks for extra feeling
Sensory walls work well at home and in classrooms. At home, you can make a safe place for exploring alone. In classrooms, sensory walls help students learn and play together. These spaces support different goals:
Benefit | Home Setting | Classroom Setting |
|---|---|---|
Encouraging sensory exploration | Yes, helps kids explore alone | Yes, helps students explore together |
Supporting motor skill development | Yes, with interactive features | Yes, helps physical skills |
Fostering creativity and problem-solving | Yes, lets kids be creative | Yes, helps group learning |
Sensory walls let kids explore with their senses. They give touch, sight, and sound input. Kids can find out what they like best.
Sensory walls are found in adult care, waiting rooms, therapy centers, clinics, hospitals, homes, and daycare centers. No matter where you build your diy sensory rooms, you help kids process sensory information and pay attention.
Visual and Auditory Elements
You can make your sensory wall more fun with visual and sound features. Bright colors, patterns, mirrors, and lights help with seeing. These features help you track things, pay attention, and know colors. For sound, you can use panels with bells, chimes, or music. These help listening skills and make the room lively.
Here are ideas for visual and sound elements:
Mirrors for seeing yourself and feedback
LED lights or fiber optic strands for calmness
Bells, chimes, or music buttons for sound play
Colorful panels and patterns for visual fun
You can plan your space and equipment to use these features safely. Check this table for tips:
Equipment Type | Description |
|---|---|
Visual Equipment | Bubble tubes, fiber optic lights, and projectors for calming effects. |
Auditory Sensory Tools | White noise machines and headphones to manage sound. |
Make sure there is space between equipment for moving.
Plan your budget and check outlets for power.
Create small areas for focused exploring.
Cover windows if using light effects to make them brighter.
You can mix these features to make your diy sensory rooms special and relaxing.
Themed Sensory Wall Ideas
You can make your sensory wall with fun themes you like. Themed walls are good for engaging kids, especially those with autism. For example, a Mermaid Sensory Wall uses seashells and ocean textures. You can add different sensory items for a cool experience.
Try these themed wall ideas:
Ocean theme: Use seashells, sandpaper, and blue fabrics for an underwater feel.
Jungle theme: Add leaves, twigs, and animal prints for a wild adventure.
Space theme: Use shiny foil, star stickers, and dark fabrics for a space look.
Farm theme: Include burlap, fake grass, and animal shapes for a farm wall.
You can change themes as kids grow or their interests change. This keeps your sensory wall new and fun.
Adapting for Age and Needs
You can change your sensory wall for different ages and needs. Younger kids may like bright colors and simple textures. Older kids may want harder activities like braiding ropes or puzzles. If you work with kids who have sensory processing disorders, you can adjust features for them.
Here are ways to change your sensory wall:
Visual stimuli: Use colorful patterns and LED lights that grab attention but do not overload.
Tactile components: Give many textures and materials for different touch feelings.
Auditory features: Add sound panels and music buttons for soothing or fun sounds.
You can make zones for calming, play, and exploring. This helps kids feel safe and lets them pick what they want to try. Your diy sensory rooms can change as you need. You can add new ideas or update your wall to make it better.
Tip: Ask kids what they like most. You can use their ideas to make your sensory wall even better.
You can build a sensory room that helps relaxation, creativity, and learning. Your sensory wall ideas will help you make a space where everyone feels welcome and calm.
Safety and Customization Tips
Safety Best Practices
You want your sensory wall to be safe for everyone. Start by checking all materials before you build. Make sure nothing has sharp edges or small parts that could cause choking. If you use glue or tape, pick non-toxic options. You can cover rough surfaces with soft fabric. Always secure items tightly so they do not fall off. If you work in a classroom, ask about fire safety rules. You can use flame-resistant materials for extra protection.
Tip: Test each sensory item with your hand first. If it feels safe to you, it will likely be safe for kids.
Easy Installation Methods
You can install your sensory wall without making permanent changes. Command strips with Velcro work well. They let you move panels or swap items as needed. If you use foam boards or cardboard, you can hang them with hooks or sticky pads. In a classroom, you can set up portable sensory panels. These panels move from room to room. You can use a table to compare installation methods:
Method | Best For | Notes |
|---|---|---|
Command strips | Home, classroom | Easy to remove and update |
Velcro | Classroom | Safe for frequent changes |
Hooks | Home | Good for heavier panels |
Sticky pads | Home, classroom | Quick and simple |
Note: Always check that your installation holds up to daily use. You want your sensory wall to stay strong.
Customizing for Sensory Preferences
You can make your sensory wall fit each child’s needs. Kids with autism may like soft textures or calming lights. Some children want bright colors or sound panels. You can ask kids what they enjoy most. Change items as their preferences grow. Try adding new sensory features every few months. You can create zones for touch, sight, and sound. If you notice a child feels overwhelmed, you can remove or swap items.
Let kids pick their favorite sensory panels.
Adjust lighting for a calm mood.
Add or remove sound features based on feedback.
Callout: Every sensory wall is unique. You can change it anytime to help kids feel comfortable and happy.
You can make a sensory room wall that fits your space. These walls are easy to build and cost less money. They help kids in many ways:
Improve social skills and help kids focus
Support movement and balance for children
Help kids relax and learn while playing
Manage stress and lower repetitive actions
Be creative, but always think about safety first. Use calming colors and soft textures for a peaceful feeling. Want more ideas? Look at these cool wall designs:
Wallpaper Design | Description |
|---|---|
Calm Blue and White Ombre Wall Mural | This mural is soothing and helps you relax and balance |
Cevenne Neutral | Soft watercolor strokes make a calm background |
Olympus Sage | Gentle green colors bring peace and help you focus |
Tip: Share your sensory wall projects in the comments. Connect with others to get new ideas!
FAQ
How do you clean a sensory wall?
You can wipe most surfaces with a damp cloth. For fabric panels, use a vacuum or lint roller. Always check for loose parts before cleaning.
Can you use a sensory wall for older kids?
Yes! You can add puzzles, braiding ropes, or more complex textures. Older kids enjoy interactive panels and themed designs.
What if you have a small space?
You can build a mini sensory wall on a foam board or cardboard. Hang it on a door or use portable panels. Small spaces work great!
Are sensory walls expensive to make?
No, you can use recycled materials and everyday items. You save money by making panels yourself. Try buttons, fabric scraps, or bubble wrap.
See Also
Exploring Creative Sensory Space Concepts for Home and School
Affordable DIY Strategies for Creating Sensory Rooms
Effective Sensory Room Concepts for Educational Settings
Ultimate Handbook for Establishing Sensory Rooms at Home or School